I've had my Buddipole for about nine months and have loved it except for one thing. I still needed the ability to operate on 75-meter NTS, RACES nets or the 60-meter MidAtlantic Emergency net. Now I know the original premise of the Buddipole was for backpacking and limited space, but the Buddipole is now also being used by folks in EmComm for emergency "go kits", so an 80-meter solution was quickly needed.
Most HF emergency communications is state or region-wide, such as when we linked the Albany, Harrisburg and Trenton EOC's on 75 meters during the phone overloads on September 11, 2001. It is not about exchanging brief signal reports with Botswana. For reliable HF emergency communications short of the skip zone, antennas that radiate and receive mostly from above are superior to those that look out to the horizon, which is the traditional way amateurs usually design antennas. This is referred to as Near Vertical Incidence Skywave (NVIS) mode communication and is extensively used by the military, especially in mountainous terrain. Pat, W0IPL of Colorado ARES has an excellent website explaining NVIS concepts.
I recently took a job that involves a commute by train and a couple ideas were floating in my head during these train rides. W0IPL recently did some tests on modifying a military NVIS antenna design for operation on the 80, 60 and 40 meter bands that looked good. What intrigued me is that for NVIS work both he and the military found that inverted vee's with a center height of about fifteen feet and end heights of about 2.5 feet for the 80 meter band were optimal for maximizing the medium range signal to noise ratio. The amateur band resonant leg lengths he found were 55.2 feet (16.8 m) for the 75 Meter Band, 42.3 ft (12.9 m) for 60 Meters and 31ft (9.5 m) for 40 Meters. Since the Buddipole already handles 40 Meters, the latter wasn't necessary for my plans.
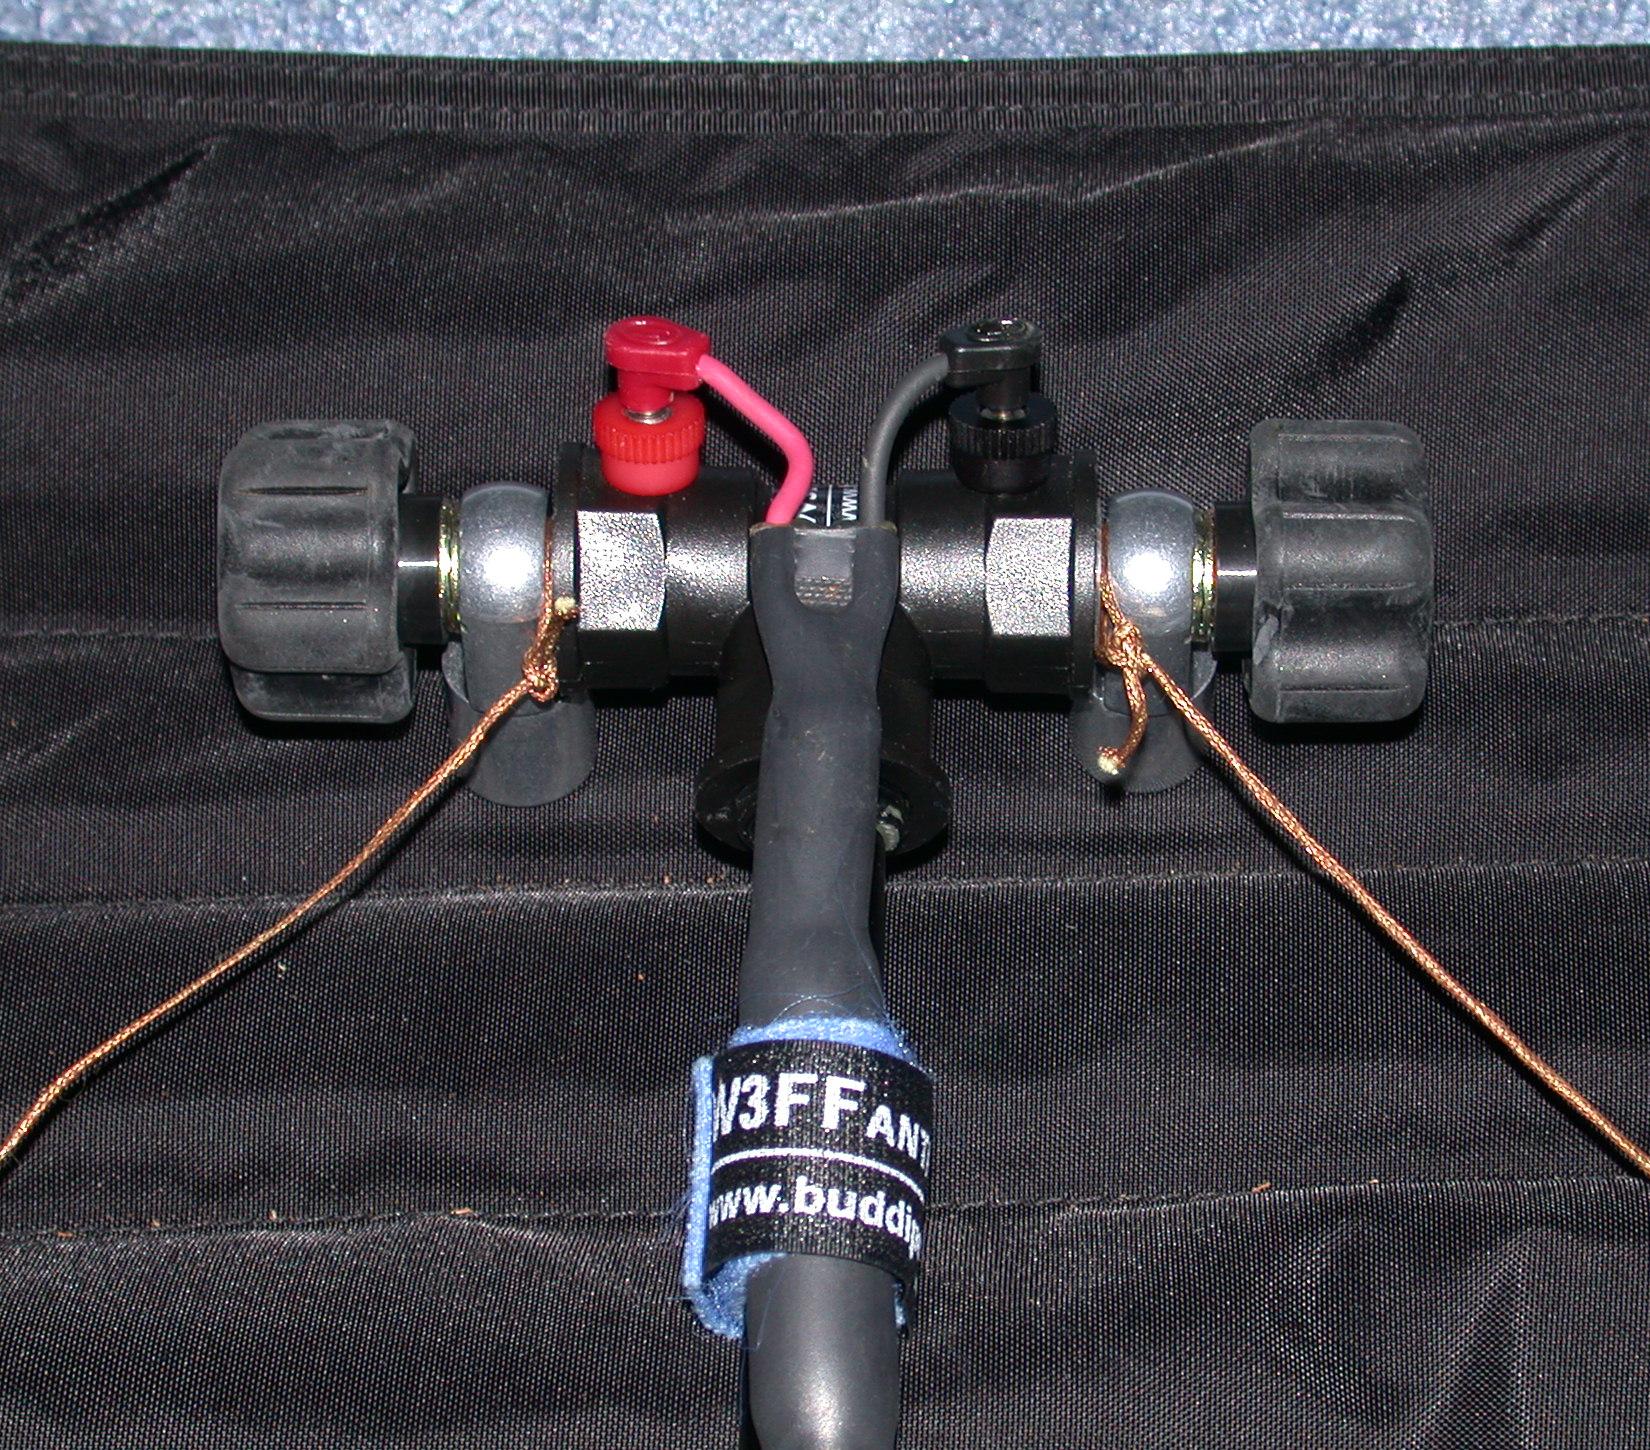
As I already owned the sixteen-foot mast and tripod for my commercial Buddipole (CBP), the thought came to me that perhaps I could use the CBP for the center support to hold up the center of a 15 foot NVIS inverted vee. I then thought that perhaps I could also use the Buddipole Center Tee as the insulator. But how could I attach the wire of the dipole legs? I first thought of using screws and washers, but then realized if the wire was light enough, I could simply form a one inch diameter loop in the wire, slip it over the shaft of the screw of the adjustable arm adapter and use the machined metal fitting of that adapter as the washer against the center conductor!
I had access to some old uninsulated, braided, portable antenna wire and was able to get two 64 feet (19.5 m) lengths from it. In each length, I tied a bowline knot at one end to form a small one inch loop and used the adjustable arm adapters to connect them securely to the center tee.
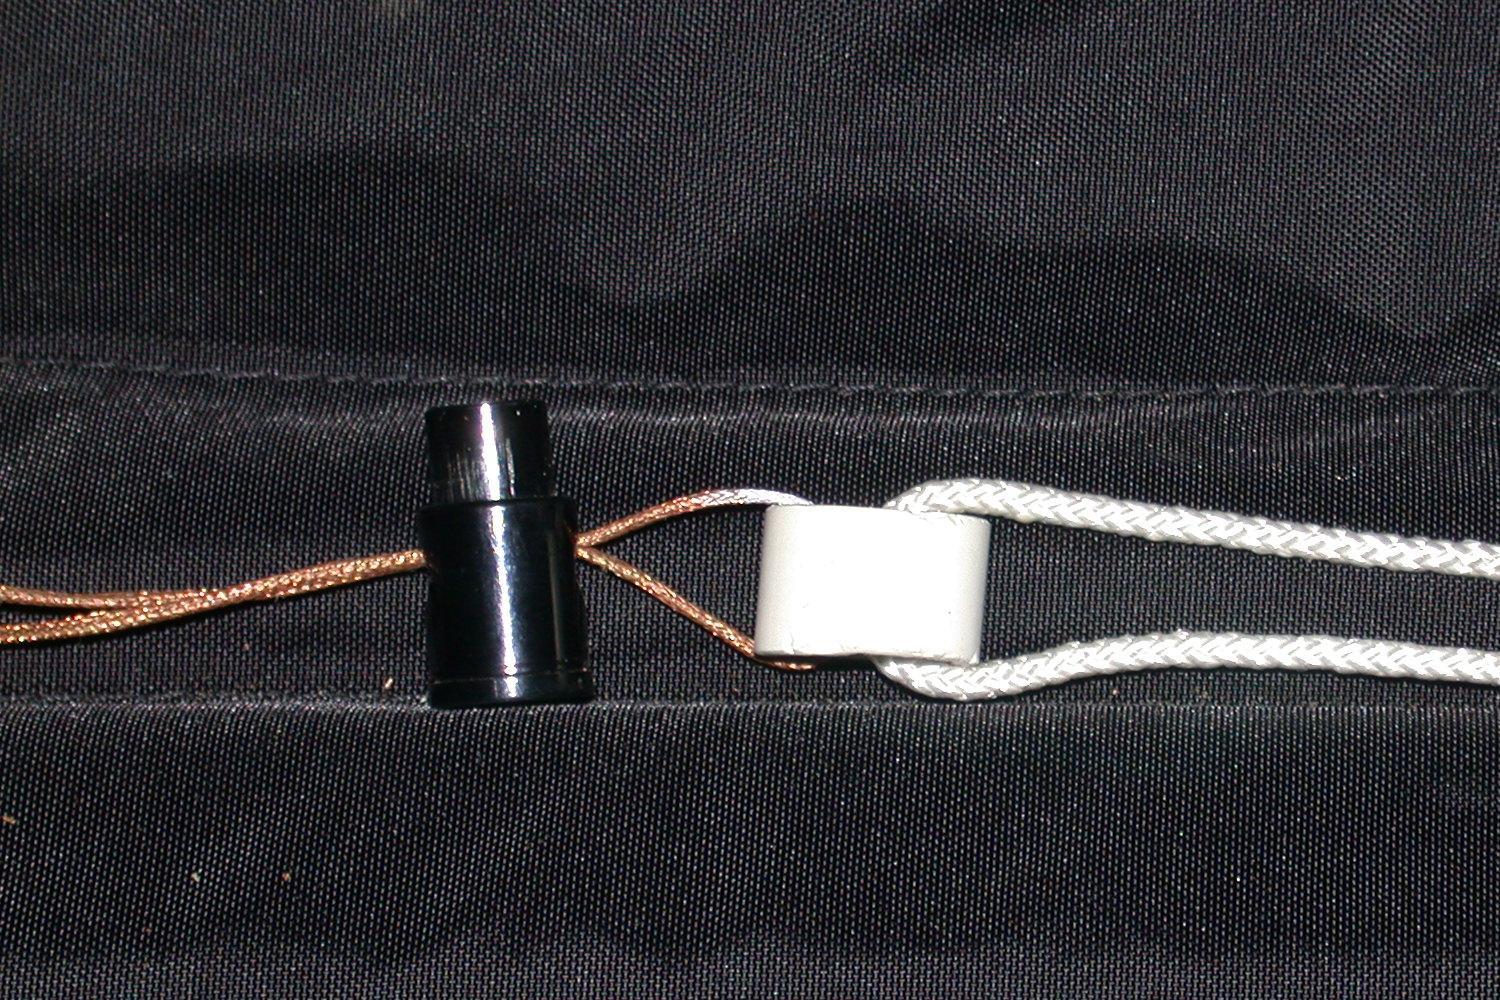
But I didn't want to cut the far ends of the antenna wire for fear of making them too short. I then remembered how another ham had used simple spring loaded cord locks from a camping store to secure the ends of a temporary dipole, but keep it readily adjustable for different bands. By using this method, I could make the same wire function on 80 CW, 75 Phone and 60 meters merely by shortening the antenna wire and wrapping any excess wire back on itself and clamping it when operating on the higher frequencies. This also allows band changes and fine tuning at ground level without having to lower the center support structure.
I quickly found four cord locks, two small sections of PVC pipe for end insulators, two small tent pins and two fifteen feet of 1/8 inch nylon twine to complete the project. To ease adjustment in the field, I marked the leg wires every meter with black enamel, and used red enamel for the five, ten and fifteen meter points from the center. Once I tuned the antenna for my favorite frequencies, I would later add yellow, white, green and blue enamel marks for the optimum lengths for the 60 meter, 75 RACES, 75 DX and 80M CW bands.
Marking things in meters instead of feet makes doing the math mentally in the field much simpler. The leg lengths in meters for an inverted vee are a bit less than the band divided by four. For example, for the 80 meter band each leg would be a bit less than 20 meters in length. Using meters means there are also fewer marks to count and the next one is always about an arm length away!
On Saturday, I joined the NJQRP Society for the QRP in the Field operation. We tried the new NVIS setup and were shocked to find that the antenna analyzer gave us a 1.1 to 1 SWR on the 80 meter CW portion right out of the box! Gerry, N2GJ used it to run the NJ NTS CW net on five watts and we had great reports from around the state. We spent the rest of the morning adjusting and marking the optimum lengths for 75 phone and 60 meters. On the air tests with twenty watts from my FT-897 were outstanding along the east coast.
Gerry and I were so excited by the antenna we then brought it out to local Walkathon on Sunday as a demo station (We always have enough hams for the walk itself on 2 meters, so we figured we'd add something different). Total set-up time for the antenna and radio this second time was less than twenty minutes. We had great reports on the NJ NTS 75-meter phone net and NJ NTS 80 meter CW net, passing and receiving three formal messages from the park.
Since we now have a new NVIS inverted Vee antenna based on the Buddipole, we call it the Buddipole N-Vee! That's what your friends will also have when they see you use it!
To make you own Buddipole N-Vee, here are the Commercial
Buddipole (CBP) parts you will need:
1 CBP Center Tee
1 CBP Balun and cable
2 Adjustable arm adapters
1 Sixteen foot CBP mast, guys, stakes and tripod
Additionally you'll need about twenty dollars of locally
obtained materials:
2 Nineteen-meter or so lengths of light, flexible uninsulated
antenna wire.
Flexweave is probably
the best currently commercially available.
4 Spring-loaded cord locks from a camping store.
2 One inch lengths of 1 inch PVC pipe for end insulators
2 Twenty foot lengths of light nylon twine as end ropes.
2 Light tent pins as end anchors (you could use rocks in rocky
terrain)
2 Pieces of light plywood (about 8 inch by 3 inches) to store
the wire legs on.
You can also look for
plastic spools used for kite flying or fishing line.
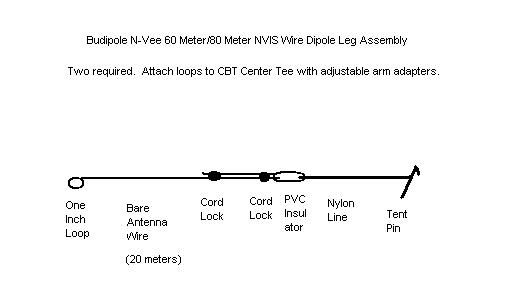
To construct each dipole leg:
To use the Buddipole N-Vee:
Here's what I found works for me. Your lengths may vary somewhat due to varying soil conductivity:
Leg Lengths:
| Meters | Color | Use | Resonance |
|---|---|---|---|
TWO CAUTIONS:
So if you want a quick and easy way to get on 80 and 60 Meters in NVIS mode, give the Buddipole N-Vee a try. And please let me know of your experiences and ideas.
73
Gary Wilson, K2GW
SNJ SEC
Version B
26 Apr 2004